Friday, October 5, 2012

YNS Fun Friday


Good Friday morning everyone! I am thrilled to be able to share a card with you today because I was asked to be this months guest designer for Your Next Stamp! Woohoo! If you weren't already aware, YNS is one of my all-time favorite stamp companies! Their designs are so adorable and I just love to color them with my Copics! That being said, I am just over the moon excited to be able to join the fabulous YNS design team again this month!

Anyway, today I participated in this week's YNS Fun Friday. For the month of October, our Fun Friday theme is "Let it Snow". Of course I had to pull out the adorable snowman from the "Freezy the Snowman" set. He is just so stinkin' cute! Also, I wanted to use a sentiment from the amazing "Holiday Snow Globe Set". I just love that set!

To create my card, I pulled some Garden Green card stock (SU!) for my cardbase and embossed it using my snowflake Cuttlebug folder on half of the card front. I then layered on some panels using Riding Hood Red (SU!) and Chocolate Chip (SU!) card stock. I stamped and colored the snowman using my Copic markers and then cut him out using the Spellbinders Labels Eighteen dies. I used the Martha Stewart snowflake border punch to add some detail to the red strip and embellished with some ribbon and brads. 

Now on to my favorite part of the card. The dp. Can you tell what it is? My 20 month old daughter colored it for me! I was trying to figure out a way to really personalize our Christmas cards this year and what better way then by having her help me make them??? My husband absolutely loved the idea and was amazed that I could create a card that still looked well put together after using a piece of paper that had been "scribbled" on. I think her "scribbling" just adds so much though! What do you think?

Well, that's all for today's card! Stop by the YNS blog to see what everyone else has created for today's Fun Friday challenge! Feel free to play along as well! We would love to see what you create! 


Wednesday, August 15, 2012

Tutorial: Creating an Inked Background

Good evening everyone! I apologize for my brief absence. We went on a fun family vacation last week and I never had a chance to upload my cards before leaving because I had hoped we would have some sort of internet service. Boy was I crazy for thinking that! We didn't even have phone service, let alone any kind of internet! Anyway, I am hope now and am really excited to share today's card with you!

For my card I used the Happy Birthday Mermaid stamp set from Your Next Stamp. This set is SO stinkin' cute! Probably one of my favorites in my entire stash. I colored her with my Copics and added some stickles to give her some fun sparkle. I then decided to share how I create my inked backgrounds with you so I created a short video tutorial on that. You can check that video out below if you are interested. The paper is called Dreamy from My Mind's Eye. I just love the extra glitter that it has in it!


Thanks for stopping by and I hope you enjoy your night!

Products Used
Stamps: Your Next Stamp Happy Birthday Mermaid
Ink: Memento Tuxedo Black, Tim Holtz Distress Ink Tumbled Glass
Paper: My Mind's Eye Dreamy, SU! Bermuda Bay, SU! Ruby Red, SU! Pink Pirouette, Papertrey Ink White
Copics: E000, E00, E11, R20, Y17, Y21, YR68, E08, E31, R32, R35, R37, YG00, YG03, YG06
Tools: Spellbinder Nestabillities Scallop Oval, Oval, Stencil Brush, SU! Scallop Edge Punch
Accessories: Dew Drops, Stickles, Bakers Twine, Washi Tape
Adhesive: ATG, Dimensionals, Tombo Mono Multi Glue

Tuesday, July 31, 2012

A Happy Birthday Ladybug


Hey there! I videoed myself creating today's card so that you could see how I made it! I must warn you though, it's a little rough. I'm still working on developing my skills and I tend to be way too picky when it comes to being crafty. Normally it's fine but when trying to video the card making process, it makes things difficult! Haha! I also had problems with my camera battery dying without me realizing it! So frustrating! Anyway, I won't go into detail on the card in this post since you can watch it for yourself in the video!


Enjoy!


Products Used

Stamps:  Your Next Stamp Lady Bug & Happy Birthday Mermaid
Ink: Memento Tuxedo Black, Tim Holtz Distress Ink Tumbled Glass    Paper: SU! Bermuda Bay, SU! Basic Black, SU! Real Red, PaperTrey Ink White
Copics: 100, R22, R27, R29, C1, C3, C5, C7, BG10, BG23, BG34, G000, W2
Tools: Stencil Brush, Big Shot, Circle and Scallop Circle Nestabillities, Swiss Dots Cuttlebug Folder, SU! Paper Snips
Embellishments: SU! Pretties Kit
Adhesive: ATG, Tombo Mono Multi Glue, SU! Dimensionals

Saturday, July 28, 2012

A Froggie Birthday!

Hello everyone! I have to apologize for my previous post. I swear to you that I typed up this huge description but for some reason, it never posted. We have had some serious internet issues so I am not sure if they are related or not. I thought about retyping the post but after being without the internet for almost a week, I am too lazy to retry. Haha! I figured, after the long break, it was probably great to see a card in general!

Anyway, I was hoping to get this card posted earlier in the week too but wasn't able to. I created this card for my nephew who LOVES frogs. I used the Deconstructed sketch challenge from last week and paired it with this fun paper from the 6x6 paper pack by Lime Twist called Out of the Blue. I just love this paper! The cute little frogs are from the Penny Black set called Toadily and the sentiment is from Paper Smooches Sentiment Sampler. I colored the frogs with my Copics, layered the image panel on a piece of Old Olive cardstock cut using my Spellbinders Labels Eighteen. 

Here is a closer look at my image.


Welp, that's all for today's card! I hope you like it! Let me know if you have any questions! 

Wednesday, March 21, 2012

You know you're from Colorado when...


...it's ok to post a snow themed card on the second day of Spring! :) I made this card Sunday night while the snow was lightly falling and I really love how it turned out! I pulled out my "daisyboardabella" stamp from Stamping Bella for the very first time! I know, crazy! She was another stamp that I had somehow managed to forget about and once I found her, she was calling my name! 

So to make this card I used Jen's Sketch For You To Try. It was another sketch that had jumped out at me so I am glad I got to use it! I colored Bella with my Copics and added some glitter to her board. The paper is from an older Cosmo Cricket Christmas pack but I thought it fit the theme of this card perfectly! I then used my Snowflakes embossing folder on my strip and cut out some snowflakes using my Snowflake sizzlits. 


That's it for today's post! Enjoy your Wednesday everyone! 


Tuesday, March 20, 2012

Welcome Spring!

Happy Spring! Is everyone else extremely glad to see Spring arrive? Even though I live in the mountains and see snow on the ground when I look outside my window, I'm still relieved to know that we are almost done with the cold weather! For some reason, this winter seemed to drag on forever. I was a little worried we would never make it to March 20th!

Anyway, I'm back to share this pretty card with you. I made it for a dear friend of mine who has been a huge blessing in my life lately. I had completely forgotten that I owned these stamp sets until digging through my supplies the other day and I am SO glad I found them! Both sets are from Rubbernecker and I had picked them up at a local craft a few years ago. The sentiment is from the set called Floral Silhouettes and the flower image is from the set called Wild Flower. Isn't it a gorgeous stamp?

To make my card I used this past week's Taylored Expressions Sketch Challenge. I fell in love with this sketch the minute I saw it and so I was excited to get to play! I also stumbled across the Splitcoast challenge from yesterday which was to use only part of an image on your card. Since my stamp was so big, this challenge was perfect for my card! I colored my flowers with Copics and added glitter to the flower centers. The background was embossed using the Sizzix Damask #3 folder. The dp is some old Stampin' Up! paper I had in my stash and the buttons are old Stampin' Up! Baja Breeze corduroy buttons.

Here is a detailed shot of the flowers.

Thanks for stopping by today! I hope some of you are blessed with warmer weather than we are today. It is currently only 30 degrees here and it's almost 2:00! Yuck!

Friday, October 28, 2011

A Halloween Pumpkin

Woah! Two posts in two days! It's a miracle! :) Ok, so I have a card that I have been DYING to share with you! I must say that I am really pleased with how it turned out! I have been itching to play with some yummy Unity so I pulled out this old Kit of the Month from Sept. 2009 and found this adorable pumpkin that had yet to see ink! I stamped it on some SU! watercolor paper and then colored it with my markers and blender pen. I just love this coloring technique and hadn't used it in awhile.  Anyway, I paired it with some fun Cosmo Cricket Nutmeg paper and found the sentiment from the SU! set called All Holidays. The sketch is an old Splitcoast sketch challenge that I thought would be perfect for today's card. I guess I love that it's fairly simple yet detailed at the same time. Does that make any sense? Haha!

I made a video showing the process of creating this card as well. If you are interested, I would love for you to watch it! :) You can either find the video at the end of this post or click on this link to watch it directly on YouTube.

Here is a detailed look at the image.
And since it's been awhile since I've shared a picture of my sweet little Addison with you, here are a few pictures of us from our trip to the pumpkin patch this weekend! :)


Here is the video for today's card:


Thursday, October 27, 2011

Spooky Magnets & Bookmarks!

Good afternoon everyone! I hope you all enjoyed my last video tutorial! I apologize for not getting this one up sooner. I have been having some technical difficulties! I think I got the bugs worked out now though and should have more videos to post this week! :)

For today's video I wanted to share with you how I made these fun magnets and bookmarks for my nieces and nephew for Halloween this year. I just love making things for them and I figured maybe you would enjoy it as well!


I apologize for not having a picture of the finished projects. I actually gave them away before I had a chance to take any pictures. At least they are getting used and enjoyed now! :)

P.S. I just found the name of the alphabet stamp set! It is called Tenley Alphabet by Stampabilities.

Wednesday, October 12, 2011

Halloween Lantern

Good afternoon! I am so excited to announce that I have started a new YouTube channel where I will be posting video tutorials! I have always loved creating videos and I love watching stamping videos so I figured, why not make my own? :) So here's what I need from you. I need to know what you want to see. What kind of videos would you be interested in watching (techniques, projects, cards, etc.)? Please leave me a comment so that I can get a list started. I know there are many stamping channels out there so I am hoping to get some fresh ideas!
Anyway, on to today's project! I wanted to create something using my SU! Bigz Scallop Square die. I purchased it a long time ago and had hardly used it so I decided it was time! As I was brainstorming I remembered seeing a box (I don't remember where I saw it) that was made using scalloped squares so I was originally going to make one but then I thought it would be fun to make something for Halloween and somehow this lantern came about! :)
 I'm going to keep this fairly short because I don't want to bore you with all of the details when you can just watch the video to figure it out! However, if you do have any questions please let me know and I will do my best to answer them! Thanks so much for stopping by! :)

Here is the video tutorial showing how to create this fun lantern!


Monday, March 28, 2011

Good Morning!

So again, I apologize for my lack of creativeness lately. I can tell you that my husband and I have been working on a couple of awesome projects that I am excited to share with you hopefully soon! I am hoping to find some craft time this afternoon as well. We will see how the little one cooperates.

Speaking of her, how about I share another fun video that I took a couple of weeks ago? This is what we wake up to every morning! It's the best alarm clock ever! :D


Thanks for stopping by! Have a great day!

Thursday, March 24, 2011

I just had to share!

Here is a video of my little sweetie! She is so much more animated lately and I absolutely love capturing moments like these! I took this video a couple weeks ago and forgot to share it with all of you! I plan on sharing more fun videos in the future. Hopefully that is ok with all of you! :)


By LORi Designs Challenge #10!

   
I'm a bad card maker. I can't seem to find time to sit down and make them lately! It's super depressing because I really enjoy creating, however, my daughter does need to come first and she's been very demanding these past couple of weeks. On top of that, we also had some tragedies happen in our small town that required my husband's and my attention last week. 

 However, I didn't want to miss a By LORi designs challenge so I made sure to make a card for this week! Check out this week's color challenge!


It's a crazy color combination but I actually thought it was fun, yet challenging! :) For my card I used this adorable new image called "Easter Lyla"! I have an Easter project in mind that I want to create this year so when I saw her, I knew she would be perfect for it...stay tuned in the future for that. Alright, back to today's card! So confession time...if you hadn't already noticed (which I'm sure you did), I colored my image a little bit differently this week. I actually cheated for the first time and used the computer! WHAT??? Don't shun me! It's something that I have always been interested in trying so since I didn't have much time this week, I went for it! As for the rest of the card, the sketch I used is from this week's Mojo Monday sketch and the paper is a variety of old Stampin' Up! designer paper. I added some stickles to the image as well as a few fun little rhinestones to finish up the look!

Well I hope you all enjoy my card! Don't hate me for my lack of posts and cheater coloring! I appreciate all of you who have stuck with me so far. I'm not sure there are many of you left but I hope you know that those of you who are, mean SO much to me! Thank you! 

 Now before you take off, be sure to check out the rest of the design team's cards! They have completely rocked it this week! :D

Thursday, March 10, 2011

By LORi Designs Challenge #8!

Welcome to another fantastic challenge at By LORi Designs! :) This week's color challenge was actually a lot of fun for me! 

At first when I saw the colors I immediately thought boy but I wanted to use this adorable image called "Happy Birthday Annie"! I then decided to think outside the box and make it feminine. I LOVE the end results!
First I made my card. I decided to use Jen del Muro's Sketch For You To Try for the month of March. It was a really great sketch and I loved the layout of it so I decided to keep my card fairly simple (simple according to my terms at least)! I found some old Stampin' Up! paper as the big background panel and added a wide piece of ribbon as the middle stripe. I then colored my image with my Copics (LOVE THEM) and added some fun little rhinestones to the corner of the image panel. After popping it up on dimensionals I then decided to add a button to the ribbon and paper pierce the top and bottom strips. I wasn't exactly sure what to do for a sentiment so I pulled out this "happy birthday" phrase from my Stampin' Up! set called "All Holidays". I stamped it on the top and bottom of the card and at first, hated the look of it but decided it was too late to go back. However, after looking at the card a BUNCH of times, I have decided that I kind of like the double stamped sentiment!
When I use digital images I tend to print out a bunch of different sizes of the image so I can then decide how big I want the image to be. That being said, I usually end up with a ton of images that never get used which means a lot of wasted cardstock. So for this week's challenge I decided to go one step further and create a little gift as well!  My husband actually received this bucket a few years ago as an Easter basket from my mom (cute huh?) and it's been sitting in my stamp closet waiting to be altered ever since so I decided this was the perfect opportunity! :) After wrapping some ribbon and a piece of designer paper around the tin I colored (with my Copics) and cut out sweet little Annie again and then popped her up on the bucket using my glue dots! I wanted to make sure to include the balloon so I cut it out separately and strung a piece of floss from it to her hand.

So what do you think? Did it turn out alright? Make sure you stop by the By LORi Designs Challenge blog so that you too can participate in this fun challenge AND you won't want to miss what the rest of the team has created! I've already seen their creations so I know they are fabulous! :D

Take care and thanks so much for stopping by!


Monday, March 7, 2011

LoVE YoU Bunches!

Hey everyone! I'm finally back! :) We had a fantastic trip and I was honestly sad to have to go home. We miss our family so incredibly much and now that we have a baby, we have become even more homesick. Anyway, I apologize for not getting crafty while I was away. Between family visits and diaper changes, I just didn't have time! Haha! However, as soon as I got home I got crafty and am back to share my creations!

I absolutely love this image from By LORi Designs! Her name is Harper and she is one of the adorable Puddle Jumpers! I actually created this card for the current By LORi Designs color challenge that you can find here! The colors are great and I had a lot of fun playing with them! The sketch is from last week's Mojo Monday blog as well! 

Well that's it for today! Thanks so much for sticking with me! I'll have another card to share with you tomorrow so stay tuned for that! :)

Before I go, here are some pictures that we took while we were in Iowa!
My sweetie and me!
Uncle Matt approves!
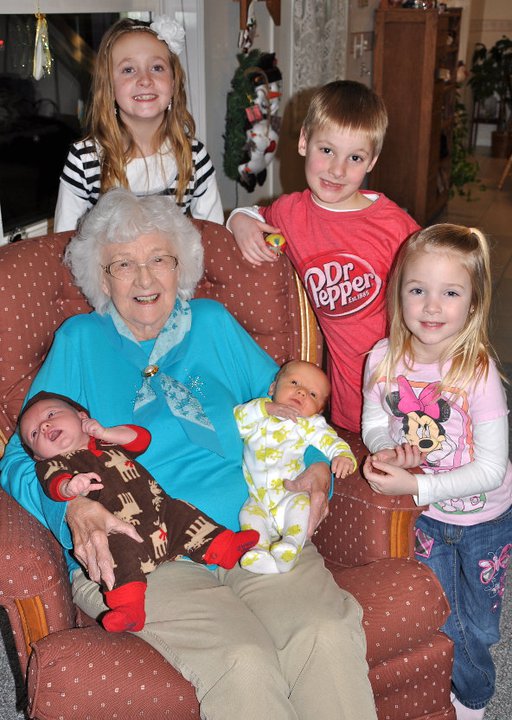
Addison meeting her cousins and great grandma for the first time!
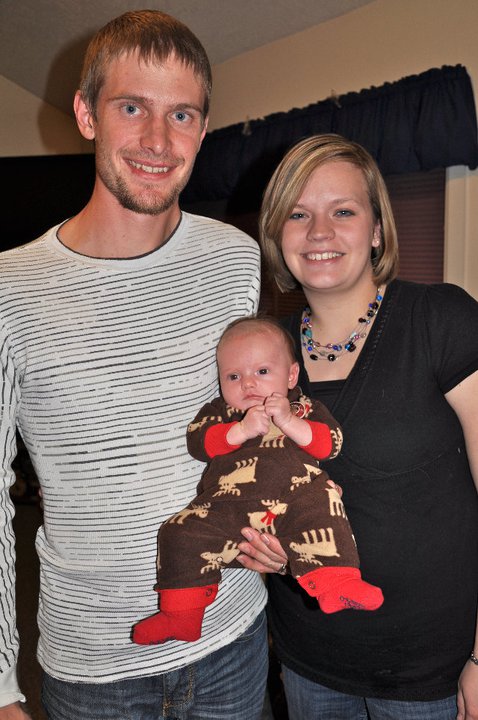
Our latest family picture. Look how much hair she has lost! :(